MBMG Modifications
How to Get Set Up
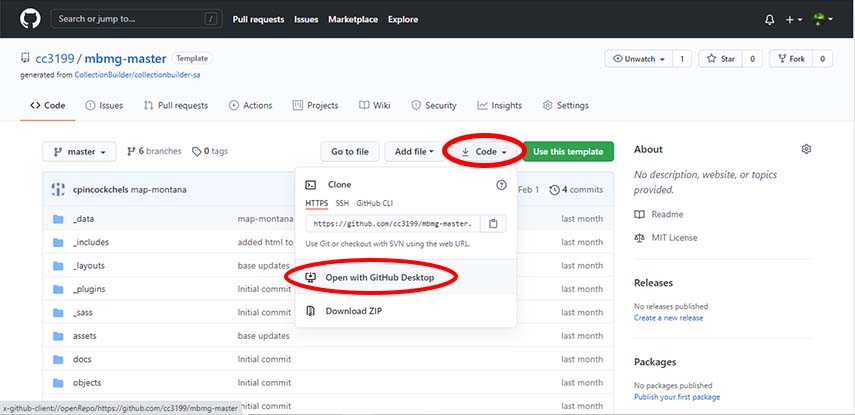
- Clone the Master branch, if you haven't already. If you have already done this when making a different collection, you do not have to do this again. Go to the MBMG Github Master code. Then you will go to the "code" dropdown and select "Open in Github Desktop". Ensure you have Github Desktop installed before completing this step. This process is called "cloning".
This will then bring up Github Desktop and a prompt will ask where you want the files to be saved. Usually the default location is fine, but, if the default location does not suit your organization style, you may select a different location and then select "ok."
Note: the master code is a template of sorts for all other collections. Do not edit the master code unless something needs to be changed across ALL collections. You will be creating "branches" that come from the master code and edits unique to that branch will remain in that branch. It will not affect other collections in other branches. For more information about how GitHub branches work, see their documentation. - Cloning mbmg-master automatically opens it in Github Desktop. Create a branch from the master code. Below the menu ribbon at the top of the page, select the drop-down menu for the “Current branch”. This dropdown menu displays the existing branches (collections), created from the mbmg-master code. To create a new branch, select "New Branch", enter the name of this branch (collection) in the typing box, and select "Create Branch".

- Your new branch based from the mbmg-master code will have your collection. Your Github Desktop should look like this:
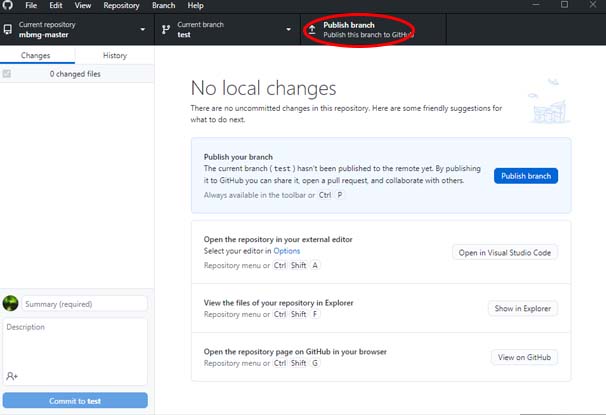
Always click the blue button to "Publish branch” to save it to Github online. This action saves your branch in multiple places both to protect it from loss and to view it online.
How to Serve Your Website
With your project repository copied to your local machine, you can use Jekyll to generate and serve your site on a local development server. The complete website will be available to use in your browser as if it is on the live web–but it is only on your local computer.
This is great for iterative development, allowing you to test changes and see what happens!
With a fresh copy of a CollectionBuilder template, you should be able to test out your Jekyll set up without making any changes to the code, generating the demo collection using the commands below.
Once you start adding your own content, configuring, and customizing, you will follow exactly the same method to start the dev server to view your project.
Open Terminal
If you are using VS Code, open your project repository folder with the editor. Use the keyboard shortcut Ctrl + ` (control + backtick “ ` “, the key left of “1” shared with “~”) to open and close the integrated terminal, or click the “View” menu and select “Terminal”. On Windows, please ensure you are using Git Bash (not PowerShell or CMD).
Bundle Install (1st Time Only)
The first time you use this project folder on this computer, type the command: bundle install.
Bundler will check the project’s “Gemfile”, install any missing dependencies, and create a “Gemfile.lock” listing the exact Gems set up for this project. You will see a bunch of output in your terminal window and if this is the first time bundling it may take awhile to finish. Once complete your terminal prompt will return.
Although it seems complicated at first, using Bundler helps avoid dependency issues on your system. The “Gemfile.lock” keeps the dependencies consistent to help reproduce the specific environment you are developing in.
Jekyll Serve
The “jekyll serve” command will start the development server and generate your site, rebuilding each time you save a file in the project folder. Using the prefix bundle exec ensures that you are using the exact setup recorded in the project’s “Gemfile.lock”.
With a terminal open in your project folder follow these steps:
- Type the command
bundle exec jekyll sand press enter. - In the terminal you’ll see some text appear (messages from Jekyll), including a URL that appears after the title “Server address:”
- Hold down Ctrl / Command and click the link to open the site in your browser, or copy the URL and paste it into a browser.
- When you’re ready to end your Jekyll session, click into the terminal, then type Ctrl + C. This stops the server from running.
The “CollectionBuilder Page Generator” plugin creates item pages from your metadata while Jekyll is running. It provides information in the terminal that might help debugging your metadata.
When you are ready to build the final version of your site to deploy, the command is a bit different–see Jekyll Build.
Creating Metadata
The metadata is the most important file for CollectionBuilder. The site will not load images or documents from your collection without it. Also, if you find any errors in the website such as a misspelling or an image not loading, it is most likely going to be due to an error in the metadata, not the code itself.
The metadata file is basically a spreadsheet that describes all of the info about each object within the collection. If an object is properly described within this metadata file, it will appear in the website, and will it be searchable. Carefully follow the steps here to create metadata for your collection, and remember to follow any special instructions for SA users.
Opening Collection In Text Editor
In GitHub Desktop, navigate to the "Repository" tab at the top, and then select "Open in Text-Editor". It may also say "Open in Visual Studio Code" or name your default text editor. Select this to bring up your collections web files and begin editing.

Modifications to Config.yml File
- Open the _config.yml file in the base of your repository. No matter which version you’re using, this file is used to configure the basics of your site.

- DO NOT CHANGE the section titled “URL Variables.”
The following section titled "Site Settings" is where the primary changes will be made in this file. Make sure to delete the existing template text in red, and replace it with your own.- Title: This is the title of your collection and will appear as the title of your home page and as a header on all other pages.
- Tagline: This optional element functions as a subtitle and will appear on the homepage and in the header on all other pages.
- Description: Include up to a paragraph to briefly describe the collection. This appears on the home page under the featured banner image.
- Author: Leave this as MBMG.
- Keywords: Enter a few keywords that match your collection separated by a semicolon, such as montana;geology;photographs; etc.
DO NOT change the organization name, link, logo-banner, and logo-nav. These are entered correctly for MBMG use.

- The only components to configure in "Collection Settings" deal with metadata. Change 'metadata' to the filename of the metadata document created in an earlier step. Do not include the file extension (which should be .csv).
Under "page_gen," next to "data", replace “demo metadata” with the metadata filename that you created.
Modifications to the theme.yml file
This file determines the appearance and images displayed on the web pages. Please follow the CollectionBuilder documentation for help with this file. Reminder: follow any special instructions for SA users.

Adding to Existing Metadata
- Locate the metadata file in Visual Studio Code. For demonstration and training, the metadata file is demo-metadata. Right click on the file and select "Reveal in File Explorer."
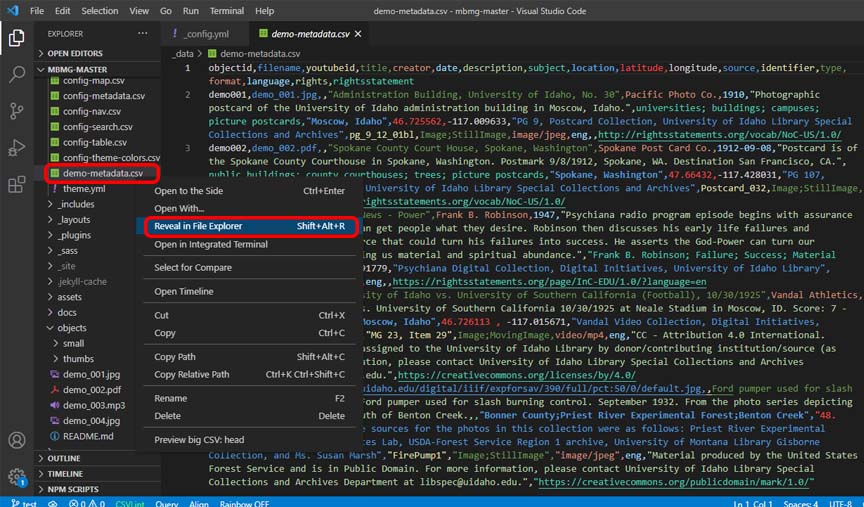
This will open your collection files. The "_data" folder stores the .csv files. Locate your collection metadata file, and open it in Excel or another spreadsheet program.
- Follow the same format and styles as the existing data to enter your new data. Review metadata requirements and formats in CollectionBuilder documentation.
Adding Objects
- When adding your collection objects to CollectionBuilder, ensure all of your files match your metadata especially in the "type" and "format" columns, otherwise the objects will not display properly on the website. Take all of your collection files and copy and paste them in to the "objects" folder. Your files should be OUTSIDE the "small" and "thumbs" folder. Those will come into play next. Feel free to delete the demo objects; they are solely for demonstration.

- Use Visual Studio to duplicate your objects in the "small" and "thumbs" folders
Open Visual Studio, navigate to the "View" tab, and down to "Terminal."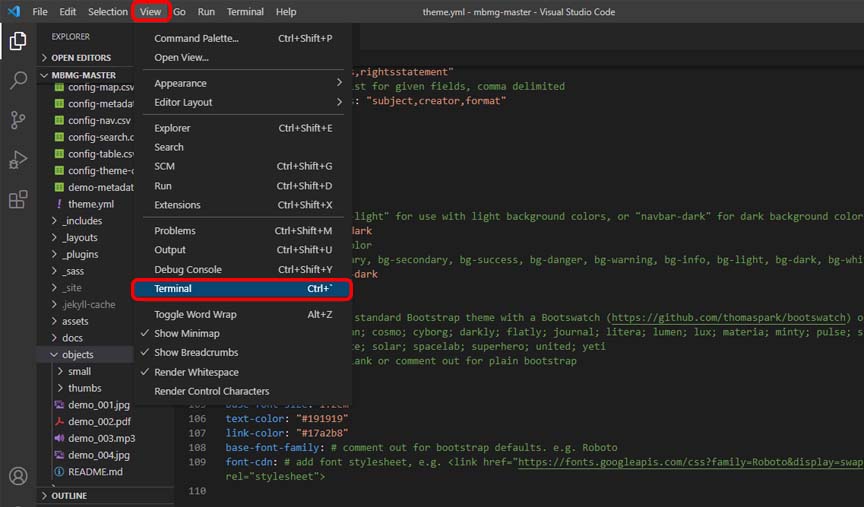
Typerake generate_derivatives. This script will copy and properly format your objects into the "small" and "thumbs" folders.
If your files do not match the filenames in the metadata, this conversion will not work. The terminal will notify you if any objects failed to convert.